- In the fight against climate change, solar power is a source of energy that is becoming more and more significant.
- Finding alternative sources of electrical energy is something that should be done to meet the electricity needs that will continue to be needed.
- This is one of the simple steps in making solar panels from scratch that can help prevent pollution, increase the use value of an item, and reduce consumptive behaviour in today’s modern society.
Every day, we need electricity with high power to run various activities in our environment. In Indonesia, where more coal-fired power plants are used, carbon emissions are increasing, potentially leading to global warming.
In the fight against climate change, solar power is a source of energy that is becoming more and more significant. The majority of the world now lacks a strategy for dealing with these sophisticated technological parts when they reach the end of their useful lives and turn into large, cumbersome sheets of electronic waste.
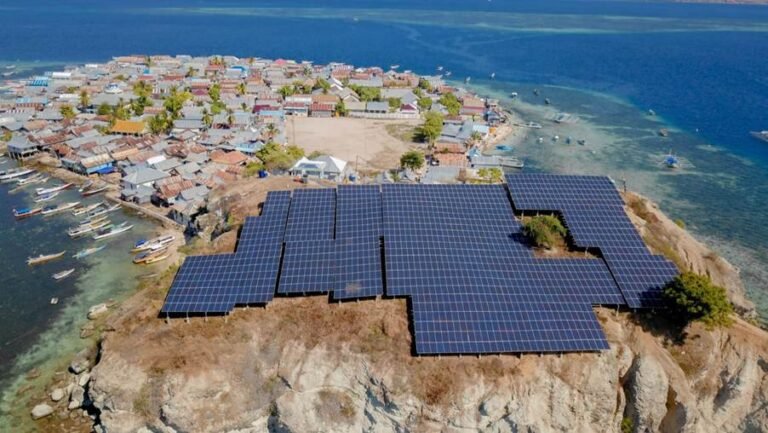
Of course, finding alternative sources of electrical energy is something that should be done to meet the electricity needs that will continue to be needed. One of the alternative energies that can be utilized is solar energy. As a country located in the equatorial region, Indonesia can take advantage of this phenomenon in the further use of solar panel energy.
By definition, second-hand goods are items that are no longer in use, but are still capable of being reused. By definition, second-hand goods are items that are no longer in use, but are still capable of being reused. Furthermore, utilizing used goods can help in reducing waste, especially plastic waste which is difficult to decompose. Then, it can help prevent pollution, increase the use value of an item, and reduce consumptive behaviour in today’s modern society.
Baca Juga:
- Wow!! Mahasiswa RI di AS Bantu Krisis Air NTT Pakai Teknologi Panel Surya
- Wow!! Panel Surya Raksasa yang Fleksibel digunakan Modul Laboratorium Luar Angkasa China
This is one of the simple steps in making solar panels using used or easily found items around us. How to build a solar panel from scratch? Let’s start by creating a template for the solar cells using some extra regular plywood, a piece of cardboard cut to the size of a solar cell, some tile spacers, and a stapler.
After the template is complete, let’s start assembling the frame by cutting a piece of 1x2x8 plywood to fit the outer frame. Placing the plywood pieces on top of the 2×4 pressure-treated plywood next, fastening them with screws, then sanding the entire frame afterwards. Apply the paint to the frame and give it two coats for a nice seal and to make it water resistant after removing any remaining additional dust.
The solar cell assembly process then begins while the first coat dries. In a nutshell, the positive side of a solar cell is on the bottom, while the negative side is on the top. With 36 solar cells overall, try connecting the solar panels in series to generate 63 watts. Let’s link the solar cells together using tabbed wire and a soldering iron. employing bus wires to join such strings of solar cells. The bus wire joins the strings at their ends to form one long string, although it is curled up much like a snake.
The pegboard needs to be screwed down inside the frame after receiving two coats of Deck and Siding paint on the plywood and pegboard. Simply drill 2 holes at the frame’s end to allow the negative and positive connectors to exit.
Now is the time to use silicone glue to secure the solar cell strings to the pegboard. After that, proceed to solder the bus wire to one end in order to connect the two strings of solar cells.
After connecting all three solar cell threads in series, come next. The twenty-two-gauge wires should be prepared for soldering. Try to connect certain connectors so that soldering them to the bus wire will be much simpler.
Baca Juga:
- Sejarah dan Komponen pada Panel Surya yang Perlu Anda Ketahui!
- Optimis Target Nol Emisi Karbon Tercapai , Panel Surya Semakin Dilirik
Use two strips of wiremold to help give the interior of the solar panel a prettier appearance and run the wires inside of those. After that, test the panel’s overall voltage by taking it outside in the sun.
We now require a deep cycle battery, a charge controller, and an inverter. It is quite easy to link the two by first connecting the solar panel connectors to the charge controller’s solar side and then connecting that to the deep cycle battery. Once the battery was connected to the inverter, everything was ready to go.
To create the uniform pressure we required, we must next install another set of the same outer frame plywood pieces that are on the bottom of the plexiglass on top of the plexiglass. To avoid damaging the glass, drill slowly into the plexiglass and use screws that are designed for pressure-treated hardwood.
Let’s complete it by joining the plywood pieces on the back that were intended to support the entire solar panel. Since most solar panels come with a junction box, kindly install one on the back of the solar panel as well. When the solar panel is connected to a battery, the blocking diode that came with the junction box stops current from flowing backward. Most charge controllers already stop electricity from flowing backwards, but if yours doesn’t, you’ll need to attach a blocking diode to the solar panel. It is advisable to mount the blocking diode outside the panel so you can quickly replace it if something were to happen to it.
Finally, use the silicon to completely round the solar panel’s borders as well as the junction box on the rear. The panel can now hopefully be mounted to your roof after one last voltage check. Please see the tutorial at https://youtu.be/a4BKuH8mqw4 that has been broken up into parts for more information and a detailed tutorial.
References:


